
Hardwood floors, laminate flooring, carpet, or tile: whatever lies below your feet, a subfloor sits beneath it to provide stability.
This essential ingredient to a safe floor ensures structural integrity by protecting the floor joists from excessive strain. Unfortunately, it’s also susceptible to water damage, which will require a partial subfloor replacement.
What Is a Subfloor?
The subfloor is a structural element of the flooring system, between the floor joists and your actual flooring. It’s made of different materials depending on the type of floor covering you have.
Oriented strand board, a manufactured wood product, is used for hardwood, laminate, or carpet, while cement board is used for tile floors. Sometimes you’ll find cement board layered with oriented strand board to better insulate the tile, or if there has been remodeling done.
If you’re not sure what kind of subflooring material you have and want to check before exploring the subfloor water damage, you can often get into the crawl space and simply look up!
Shine a flashlight between the floor joists and you’ll be able to see the material below the first floor. This is also a good way to check for subfloor damage.
What Causes Subfloors to Get Wet?
There are a variety of causes for water damaged subflooring, but some of the most common include flooding, a burst pipe, and leaking appliances. Exterior cracks in the walls or an interior leak can both allow water to enter and trickle below the finished flooring.
If you’ve recently had flooding, plumbing problems, or appliance leaks, you should have a professional contractor investigate for water damaged subfloors. Flood Kings will take a look at every component of your home and check whether you need any subfloor replacement.
How to Identify a Water Damaged Subfloor
Unfortunately, subfloor problems often go unnoticed until the damage is very advanced because you don’t actually see it. However, there are some subtle signs that can clue you into subfloor issues; all of these should be taken seriously and investigated closely.
- Sagging floors in the affected areas
- A musty smell
- Cracked or uneven tile
- Soft or spongy floor above the damaged areas
- Warped or separating laminate
- Damaged vinyl floors, identified by warping and bubbling.
Water damage repair companies like TN Flood Kings carry advanced equipment to identify moisture and can fully assess the issue. If you see one of these signs, call us right away for a free estimate.
When Do I Need to Replace My Water Damaged Subfloor?
In most cases, damaged subflooring doesn’t need to be entirely replaced, just in the compromised area. However, if the water damage is very extensive, you may want to install new subfloor for the entire room; this will be a more permanent solution, as you can be assured that you’ve removed all the rotting subfloor areas and won’t need to do this all over again. We can guide you through the process and also bill insurance if your homeowners insurance covers the cost.
How to Fix a Water-Damaged Subfloor: A DIY Guide
This is an extensive DIY project and requires some familiarity with both power tools and construction techniques; however, it’s possible to perform on your own.
You can always call a professional like TN Flood Kings for support: we have the experience necessary to identify the damage and do the job right.
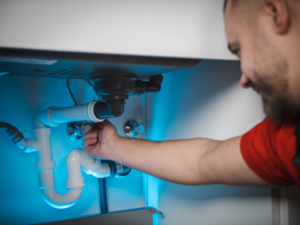
Stop the Water
Before you start your subfloor repair, you have to address whatever caused the water damage. Whether it’s plumbing issues, flooding, or a major spill, get this fixed first. Only when everything’s completely dry can you get started on removing the flooring and accessing the subfloor.
If you can’t find the leak, we have moisture meters and other equipment that can ferret out the problem and get it fixed. We’ll also install the new floor for you and bill your insurance if at all possible.
Remove the Flooring
The removal process starts with pulling up the flooring material so that you can take a look at the subfloor. For hardwood flooring, gently pull up the nails and set all the planks aside; you’ll also need to check them for excess moisture. Gather up the loose nails to be used again!
With laminate, unclick the planks in the affected area. Any boards with compromised laminate will need to be replaced too.
For carpet, pull it up to the nearest wall and roll it out of the repair area. You will likely need to remove baseboards so that you can get the carpet edges up. Wet carpet can encourage mold growth, so consider whether you may want to replace this also. Cut and discard any foam padding that’s wet.
With tile, cut through the grout and set aside the tiles. Be sure to dry and sanitize them before putting them back in place.
Assess Damage
Now that you have access to the damaged area, demarcate the areas that will have to be replaced. Measure it, then make a line with an extra few inches around the damaged materials so that you can be sure you’ve caught everything.
Gather the Tools
You will need the following to work safely:
- Rubber gloves
- Dust mask
- Safety goggles
- Tape measure
- Circular saw
- Pry bar
- Replacement pieces
- Stud finder
- Construction adhesive
- Deck screws
- New flooring if necessary
Carefully Cut Subflooring
Using the circular saw, cut all the way around the damaged subfloor. Set the saw to a one inch depth so that you don’t cut into the floor joists, as this will further imperil the structural integrity of your floors.
You should aim to place your cuts in the middle of the floor joists so that these heavy timbers will reinforce the material. Next, use the pry bar to gently prise all the material free.
Remove Damaged Areas
Set all the wet subfloor aside to be safely disposed of. Never reuse removed subflooring for other projects, even if it’s tempting to save a bit of money.
Reinforce Floor Joists
This is a good time to shore up your joists; even if they don’t appear damaged, you never want to play around with these essential elements. There are a variety of ways to reinforce them, but the most common way is “sistering,” which means adding extra boards around them.
You can also screw in bridges between joists, or create support beams within the crawl space. Be sure to add extra support around exterior walls, as these areas place a lot of strain on the material.
Install the New Subflooring
Your new subfloor must be anchored to joists on all sides, which is why it’s vital that you have cut the material in the middle of the joists. Use adhesive and nails or screws to make sure everything is snug and tight.
Replace and Re-Seal the Flooring
Hardwood will need to be nailed in, laminate clicked back into place, carpets stapled and baseboards replaced, and tile recaulked and new grouting installed.
How to Prevent Subfloor Water Damage
The most important thing here is to keep your floors from getting wet; this will ensure the subfloor stays dry and will prevent mold. Address plumbing problems immediately and clean up any spills, no matter how small. Even a little bit of moisture can easily cause water damage and necessitate expensive repairs.
Suffering From Water Damaged Subfloor? TN Flood Kings Is Here to Help! Call 24/7 For a Free Estimate!